Connect your micro:bit to your computer, head to MakeCode, and click New Project!
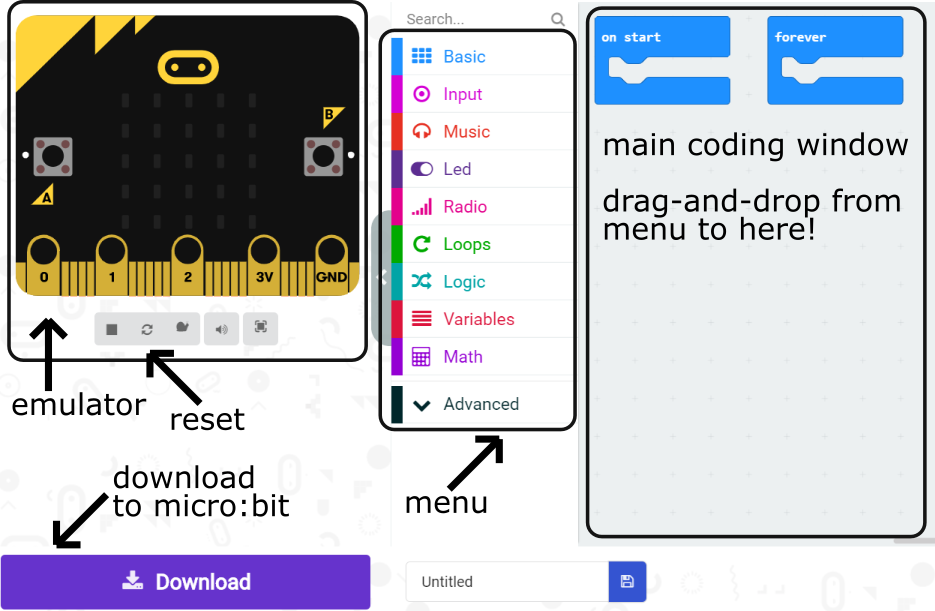
You will see a screen like this:

Displaying a Random Number
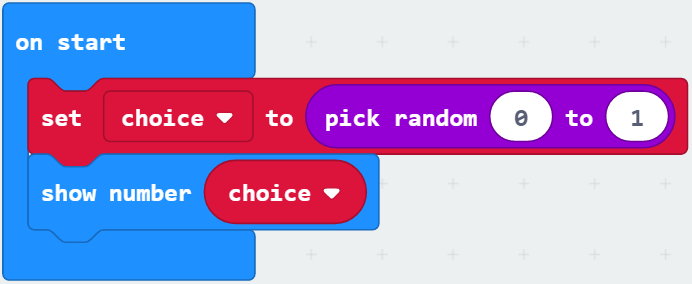
The first step is getting a random number, and displaying it on the micro:bit.

- Use the Variables menu to create a variable (a placeholder for your random number).
- Look in the Math menu for the random number code, and adjust it to only give you two numbers to start with: 0 and 1.
- Place this code in the on start block, so it will choose your number when the micro:bit is turned on.
- Finally, look in the Basic menu to find the block needed to display your variable on the micro:bit.
Test it on the emulator! Click reset to run the code again.
To run your code on the physical micro:bit, click the Download button every time you make changes!
Displaying Words
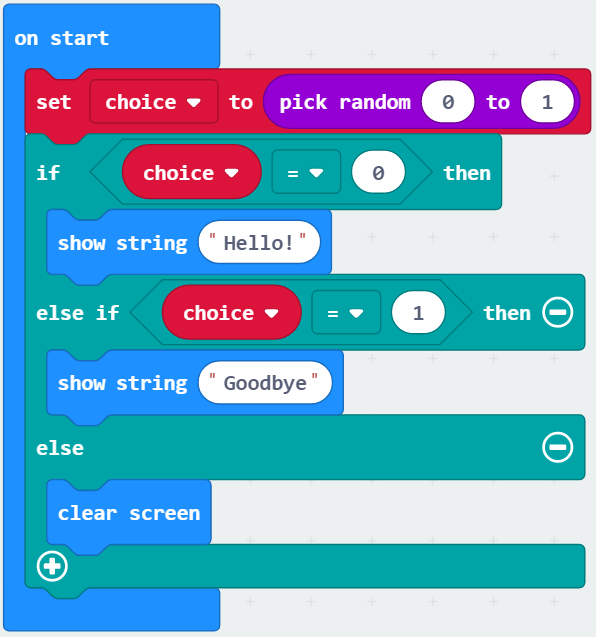
Step two, is using the random number to choose which words to display on the micro:bit.

- This if-then-else block can found in the Logic menu.
- Use the + symbol on the bottom of it to add extra spaces!
- You can use the Comparison blocks in the Logic menu, to create the logic you want...
- if random number is 0, do something but if random number is 1, do something else
Expanding your Code
Now make it your own!
- Change the random number range to add more options.
- Expand your if-then-else statement with more words.
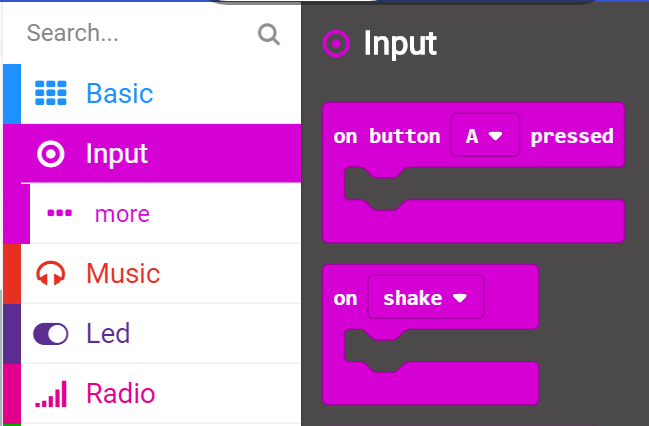
- Set the displayed word with a button press or by shaking the micro:bit instead of on start!


